Some formatting was borrowed from Tamaki's Hammer Time! Fiona Long Hammer Guide with permission.
Pillar vs. Cestus[ | ]
Pillar pros:
- More straight forward than a cestus (don't have to think about which blast gauge effect to use, or when to dodge, etc.)
- The only character that can potentially deal damage to the boss constantly without having to stop in order to block or dodge the boss's attacks thanks to Absorb Shock. This thereby significantly increases pillar karok's overall DPS.
- Has much longer reach than a cestus (thereby making it easier to disrupt the attacks of trash mobs) which combined Absorb Shock makes pillar karok the veritable king of trash mob killing. This is particularly useful at higher levels such as Ortel castle when even the normal enemies are quite dangerous... stupid hounds.
Pillar cons:
- Not as fast as a cestus
- Generally does less damage per hit (note that I did not say less DPS) due to the lack of Blast: Crushing Strike and Blast: Destroyer
- Potentially more dangerous as Absorb Shock does not absorb all of the damage and the regeneration has to be used to make up for that. During that time however, even a single arrow from a single measly gnoll archer can and will cut off said regeneration if it is not absorbed.
Overall, the two are pretty well balanced and it really comes down to preference. Consult Rod or Fist: an Evaluation of Karok's Weapons for more details on the differences.
Karok's Pillar Smashes[ | ]
This smash doesn't become useful until you get the skill War Slam at level 42, at which point it becomes one of your most powerful smashes.
- Grizzly Uppercut
Not overly useful until you get Chain Combo: Grizzly Uppercut at level 30. At that point, it allows you to use his LR (left-click; right-click) smash and then immediately pull off either his LLR or his LLLR smash.
Karok charges forward attacking 4 times. The beauty of this smash is that anytime before the 4th attack, the player can immediately roll or dropkick out of it, making it quite effective with Absorb Shock
Karok swings his pillar in front of him and then after pressing right-click a second time (LLLRR), he slams his pillar down causing a shockwave. This is pillar karok's only AOE smash. The second part of Mammoth Swing also has a very long activation period for Absorb Shock making it very good for both dealing damage, as well as avoiding it.
Skill Planning[ | ]
Most of Karok's AP should first be put towards maxing his primary skills. After those are maxed, you can safely rank up his secondary skills.
Primary Skills[ | ]
Absorb Shock[ | ]
This is pillar karok's most important skill. It sets him apart from from every other character in that it allows him to potentially deal damage to the boss constantly without having to stop in order to block or dodge the boss's attacks. It is also pillar karok's only real way to avoid damage.
- Ranking:
Max this skill ASAP
- How to use:
Used by either attacking or dodging at about the same time that the boss would normally hit you. It is important to note that it only works at the beginning of the animation for a normal attack or smash. Thus, Bison Charge will only absorb damage for the first pillar hit and not the other three. However, it is still a very effective smash to use as you can immediately dodge or dropkick as soon as the boss attacks.
Battle Respiration[ | ]
This is one of the most important skills for everyone except for Evie as it allows you to regenerate stamina much faster. As one cannot do anything without stamina, it is very important.
- Ranking:
Get it up to rank A immediately. Don't bother ranking it higher than that though as after rank A the benefits are microscopic and have a huge AP cost.
Smash Mastery[ | ]
This significantly increases the damage that Karok's smashes do. As that is where all of his damage comes from, it is a very important skill, especially since he cannot upgrade his individual smashes.
- Ranking:
Get it up to rank E immediately. After that, it takes precedence after Absorb Shock and Battle Respiration
- Note:
Must have Combat Mastery at at least Rank D in order to unlock Smash Mastery
General Skills[ | ]
Pillar Charge[ | ]
The damage done by pillar charge is truly pitiful. However, it is cheap to upgrade and rank C is needed to unlock Dropkick. Used primarily to destroy misc. objects quickly when searching for magic powders XD
- Ranking:
Get it up to rank C quickly in order to unlock Dropkick. After that, leave it alone.
Dropkick[ | ]
While Dropkick is not karok's best attack, it is made more useful due to it's excellent synergy with Bison Charge as well as the fact that it has a short recovery time, allowing you to roll out of it quickly if need be.
- Ranking:
Immediately rank it up to rank E. After that, it is really personal preference whether to focus on Dropkick or Boss Bash first.
Boss Bash[ | ]
Boss Bash is used when the boss has been knocked down by pressing E. It deals good damage and more importantly, makes Karok invulnerable while doing so thereby making it ideal when soloing multiple bosses simultaneously, such as in Source of the Rumor. Unfortunately, it 1.) pushes the boss away, which can make it difficult for your allies to hit the boss. Also, there are a lot of bosses who cannot be bashed.
- Ranking:
While it is an effective skill, due to the problems mentioned above, it should probably be ranked only after his other general skills (except for Clash).
War Slam[ | ]
War Slam is a powerful ability that allows Karok to, after reaching rank A, slam the ground as many times as his stamina allows.
- Ranking:
Should be upgraded to Rank A as soon as it is acquired at level 42.
Standing Endurance[ | ]
Reduces the chance of knockdown and at rank 9 allows the character to immediately roll out of being knocked down.
- Ranking:
It is cheap and potentially life saving at higher levels and it is thus recommended to get it up to rank 9 as soon as you reach level 30.
Critical Rate[ | ]
Critical Rate simply increases the chance of getting crits and the damage that they do.
- Ranking:
Can safely be upgraded to rank E as soon as it is acquired. After that, it falls below the above skills and his SP skills in priority.
Clash[ | ]
Clash is an ability that allows karok to stop a boss's attack in it's tracks. Even when maxed out it doesn't do a lot of damage and thus generally isn't very useful while soloing. In a group however, it can be quite good as it provides up to 10 seconds for the other players to attack the boss without fear of repercussion.
- Ranking:
It can safely be ranked to rank E as soon as it is acquired. After that though, the damage bonus isn't that good and even when maxed out the cool down is still 100 seconds. As such it should probably be saved until after all other general and SP skills.
- How to use:
Press E when the E key shows up on the boss. Once you have entered the clash, press the left mouse button repeatedly to win the clash. In order to prolong the clash in order to extend the boss's vulnerability window, left-click three-four times quickly, let off for a second. Repeat until the clash ends.
Pillar Toss[ | ]
By holding down E, Karok throws his pillar, damaging any enemy within it's path and allowing Karok to use unarmed combat.
- Ranking:
In my experience, Pillar Toss is not a particularly effective skill and thus I would recommend not ranking it up until after all other useful skills have been maxed.
Combat Mastery[ | ]
Increases the damage done by normal attacks.
- Ranking:
Should be ranked to rank D quickly in order to unlock Smash Mastery. After that, it is very low priority.
Chain Combo: Grizzly Uppercut[ | ]
This is a good skill as it allows the player to use karok's LR smash and then immediately jump to his second normal attack, thereby allowing karok to quickly pull off either a Bison Charge or Mammoth Swing. Good for both damage and shock absorption.
- Ranking:
Only upgrade this when every single other useful skill has been maxed out. Even maxed out it only reduces the cool down by .17 seconds which I've personally never found any use for.
SP Skills[ | ]
SP skills are skills that can be used only after the SP gauge has been filled to a certain amount. Karok gains SP by dealing damage with his smashes. He gains his first two SP skills at level 30.
SP: Howl[ | ]
Howl costs 1 SP bar and allows Karok to remove a single debuff. When successful, he activates a health regeneration buff. As only a handful of bosses have debuffs and since when used properly Absorb Shock prevents them, it is a highly situational skill.
- Ranking:
Even maxed out the health regen buff is negligible and that combined with the fact that Howl is very situational, it becomes a very low priority.
SP: Whirlwind[ | ]
Whirlwind costs 2 SP bars and can do a lot of damage, especially when maxed out. Unfortunately, it does not seem to work with Absorb Shock and should thus be saved for the bosses' vulnerability phases.
- Ranking:
Rank it up to rank E immediately. After that, it falls below his primary skills in priority.
SP: Earthquake[ | ]
Earthquake is a powerful ability that causes Karok to slam the ground with his pillar, damaging and slowing every enemy in a large area-of-effect. More importantly, it makes Karok invulnerable during the animation. As it costs 4 SP bars as opposed to the 2 for whirlwind, whirlwind can probably do significantly more damage. However, the invulnerability makes earthquake ideal for soloing. Thus, I would recommend using SP: Whirlwind in groups and SP: Earthquake while soloing.
- Ranking:
Since it is one of Karok's most powerful abilities and because it isn't acquired until level 52, at which point all of his other important skills should be maxed, I would recommend maxing it immediately.
Transformations[ | ]
Transformation skills allow Karok to transform into either a paladin or a dark knight for 2 minutes. Both transformations grant 50 extra stamina, 500 extra HP, and 700 more ATT. This differences don't come into play until the player has used their transformation enough times in order to level it up a few times.
The most noticeable difference between the two is that a paladin has Grace: DEF which can increase DEF up to +750. A dark knight on the other hand has Revelation: ATT which can increase ATT up to +1500. Thus, the paladin takes less damage and the dark knight deals more. Since Absorb Shock does not absorb all of the damage that Karok takes, I find that the increased DEF of a paladin is more effective on pillar Karok. It is the player's choice however. Take a look at the path skills of the two transformations before you make your decision.
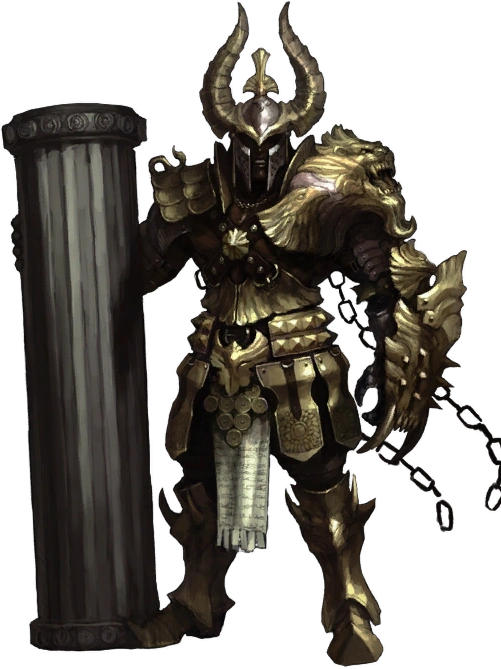
Dark Knight Transformation[ | ]
![]()
Paladin Transformation[ | ]
![]()
Training Skills[ | ]
Training skills are simply skills that grant passive bonuses to a character's attributes.
Strength Mastery[ | ]
![]() Grants bonuses to STR. Since every point of STR is worth 2 points of ATT, it is Karok's most important attribute.
Grants bonuses to STR. Since every point of STR is worth 2 points of ATT, it is Karok's most important attribute.
- Ranking:
After all primary and general skills
- Since Strength Mastery is the only particularly useful training skill for Karok, I shall list the other ones in the order that they should be ranked. Note that they should only be upgraded after all other useful skills have been maxed.
Willpower Mastery[ | ]
![]() Eventually get it up to rank D for Life Flare
Eventually get it up to rank D for Life Flare
Stamina Mastery[ | ]
![]()
Health Mastery[ | ]
![]()
Agility Mastery[ | ]
![]()
Meditation[ | ]
![]()
Equipment Skills[ | ]
Equipment skills are ones that have to be at a certain rank in order to wear certain armors and use certain weapons. At the levels when such equipment is available, these skills take precedence over all other skills. I shall list what ranks of each skill (other than Cloth Armor Proficiency since it's useless to Karok) he should have at various levels
Light Armor Proficiency[ | ]
![]()
- Level 26: Get it up to Rank E for the Exquisite Savage Leather Armor Set
- Level 52: Get it up to Rank B for the Royal Cadet Heavy Beret
Heavy Armor Proficiency[ | ]
![]()
- Level 30: Get it up to Rank D for the Blood Prince Set
- Level 40: Get it up to Rank C for the Exquisite Spider Lord Set (if you decide to use Spider Lord armor, afterall, one only has to wait another 4 levels before getting the much better Laghodessa armor)
- Level 44: Get it up to Rank B for the Exquisite Laghodessa Slayer Set
Plate Armor Proficiency[ | ]
![]()
- Level 40: Get it up to Rank C for the Exquisite Spider Lord Helm (if you decide to use Spider Lord armor, afterall, one only has to wait another 4 levels before getting the much better Laghodessa armor)
- Level 44: Get it up to Rank B for the Exquisite Laghodessa Slayer Helm
Pillar Mastery[ | ]
![]()
- Level 26: Get it up to Rank E for the Goblin Scimitar Pillar
- Level 30: Get it up to Rank D for Ulchas
- Level 36: Get it up to Rank C for the Black Scar Battle Pillar
- Level 44: Get it up to Rank B for the Nightmare Battle Pillar
- Level 60: Get it up to Rank 9 for Palladium
Misc. Skills[ | ]
HP Potion Proficiency[ | ]
![]() This is a cheap skill that can easily save you a lot of money on HP potions.
This is a cheap skill that can easily save you a lot of money on HP potions.
- Ranking:
After all other primary and general skills
Campfire[ | ]
![]() A cheap skill that can give Karok both invulnerable armor (not as important for him as Fiona, but still nice) and up to 225 ATT
A cheap skill that can give Karok both invulnerable armor (not as important for him as Fiona, but still nice) and up to 225 ATT
- Ranking:
After general skills and HP Potion Proficiency
Life Flare[ | ]
![]() A very expensive skill that even when maxed out, only gives Karok a 35% chance of surviving a fatal blow.
A very expensive skill that even when maxed out, only gives Karok a 35% chance of surviving a fatal blow.
- Ranking:
After primary, general, and all other misc. skills and after Strength Mastery