- For NPC, see Black Hammer (NPC).
- For the boss of Rescue, see Warlord Black Hammer.
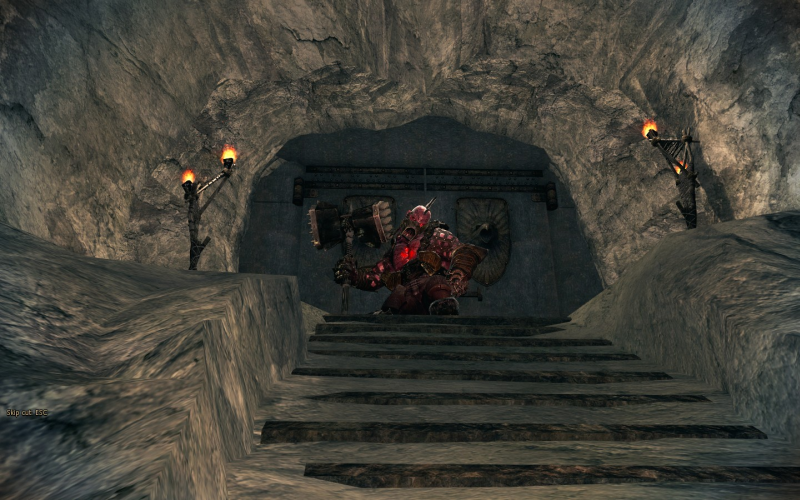
| Controlled Black Hammer | |
 | |
| Type | Ogre |
| Location | Albey (Boss of Betrayal) |
| Alignment | Aggressive |
| Season | Season 1 |
Stats[ | ]
| Normal / Hard Mode |
|---|
Level: 64 Exp: 2,280
HP by Group Size -
1: 800,000
2: 800,0003: 800,000
4: 800,000 |
Related Titles[ | ]
Drops[ | ]
Regular Drops[ | ]
| Materials | Equipment | Etc. | |
|---|---|---|---|
| Normal / Hard Mode | Ancient Erg Crystal, Controlled Warlord Emblem, Cracked Steel Gauntlets | Cuallemeach Gauntlets, Deathwind Gloves, Fallen Angel Gauntlets, Lightwind Gloves Passionate Debueruke Gauntlets, Silent Quemielle Gauntlets, | Empowered Enhancement Stone |
| Break Offs | Bone Blade Fragment, Destroyed Horned Belt |
Quest-Only Drops[ | ]
Break Off Tips[ | ]
- Location: Head
- Number of hits: 6 (3 per flinch, 2 times)
- Tips: Spears, Sticky Bombs, Kai's Active: Hand Bomb, Magnum, Eagle Eye Assault, and Vella's Active: Frostbite
- The break off point is his face, not his head in general. So break off moves need to be used in front of him with the exception of Magnum, Active: Hand Bomb should be triggered when he bends over for an attack.
- Reward: Bone Blade Fragment
- Location: Belt (Waist)
- Number of hits: 6 (3 per flinch, 2 times)
- Tips: Spears, Sticky Bombs, Kai's Active: Hand Bomb, Magnum, Eagle Eye Assault, and Vella's Active: Frostbite
- The break off point is the wheel on the back of his belt. Kai's Magnum can hit through his belt completely, Vella needs to be behind him when using Active: Frostbite, and when using Eagle Eye Assault Kai needs to be behind him.
- Reward: Destroyed Horned Belt
Battle Skills & Attacks[ | ]
- See the notes section about stages of attack patterns.
- Stage 1
- Sets his hammer down, swings upward from left to right and immediately swings upward from right to left. Moves forward while doing both swings.
- Swings in a wide arc near the ground from the right side.
- Twirls his hammer above his head and swings it around himself, then slams downward.
- Steps forward and sets one end of his hammer down on his right side, swings upward from right to left and sets his hammer back down on his right side. He then raises his left fist and picks his hammer up. Takes 3 seconds from fist to hammer pickup before he can attack again.
- Stage 2:
- Hits both hammers together, steps forward with both legs and slams both hammers down in front of him.
- Bends down, then quickly jumps and slams down where he was previously standing. Has an area of effect around him on impact.
- Stomps with his right foot.
- Bends and lets both hammers touch the ground, then moves forward while spinning twice.
- Stage 3:
- Raises both hands up, bends and rolls forward.
- Bends down, jumps and slams down. Has an area of effect around him on the slam.
- Stomps with his right foot.
Tips & Advice[ | ]
- If you are trying to get his Break Offs, try to avoid attacking him at the start. It is considerably easier to aim Spears or Sticky Bombs when he's in stage 1 than it is for stage 2. You could also wait until he's in stage 3, when he throws in hammer away. Keep in mind when he's at stage 3 he's very close to death.
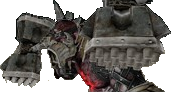
- Controlled Black Hammer has three stages. Each stage has a different set of attack moves. The first stage his hammer is like it was in Rescue (one piece). After he loses 1 to 1 1/2 bars of HP he'll get angry and break his hammer in half, making it dual wielded weapons. His third stage happens when he has 1 to 1 1/2 bars of HP left, and his hammerheads of his weapons will break apart, thus, he'll throw his hammer away.
Additional Notes[ | ]
- Controlled Black Hammer was Warlord Black Hammer after he was possessed by Verafim via the Fomor Domination Spell.
- There is a pit at the edges of the battle area. Below are Hemdrills, Spiders and all five Soldier Spiders. You can use these to build SP if needed, such as for the no HP Potion oath (Evie Regeneration). The fall is high so it may kill you (Lann, Fiona, Karok, Kai, Vella). Evie will be saved by Mana Shield if she currently has some or she can safely use Mana Amber to fall down. There is a blue circle at either end of the pit. Touching these will teleport you back up to Controlled Black Hammer's area.
- There are four blue circles (2 on the boss stage, 2 on the pit) but only 2 (one on the boss stage, on the pit) will active at a times, and it will switch between circles.
- It is possible to kill Controlled Black Hammer without him progressing through all three stages, if so much damage is applied in stage one that it skips over the HP trigger during an attack. If this happens the third stage will be automatically skipped.
- He's smaller than he appeared in Rescue
Image Gallery[ | ]
Want to add your own image? Upload your Image and Edit the Gallery. For help, view Gallery Help and Guidelines.